Monday, November 23, 2009

Tumbling Cow Chocolate Cupcakes with Fluffly Vanilla Buttercream Frosting


This chocolate cake recipe comes from Rose Levy Beranbaum's The Cake Bible (a must-own book if you ever plan to make a cake) and is the best chocolate cake recipe I have found. Also, although this cake calls for an unusual preparation (the butter is mixed into the dry ingredients rather than the other way around), the cake is also almost absurdly easy to make. Two nights ago, I coupled it with Fluffy Vanilla Buttercream from the book Martha Stewart's Cupcakes and was very pleased by the results. The bittersweet chocolate flavor of the cake is the perfect match for the sweet fluffy buttercream, and, while I am usually not much of a sweets person, I couldn't keep these out of my mouth this weekend. I've taken this cake to several parties and at one of them, I heard someone whisper as she bit into the soft cake, "Oh my God, this is the best chocolate cake I've ever tasted!" Enough said. Go ahead and give it a try.

*Cupcake Notes: The chocolate cake is supposed to be made using Dutch-processed cocoa powder. However, since I only had regular cocoa powder on hand, I added 1 tsp of baking soda to the water and cocoa mixture. This keeps the cake from tasting bitter, and is a must-do if you use regular cocoa powder.

And, just in case you are wondering, those are cows on the top of the little cupcake. Several years ago, my sister (see Yoganomics) gave me one of those bottles split into four quadrants; each quadrant contains sugar barnyard animals one can use to top cupcakes and such. Here, the cows tumble happily over the fluffy buttercream before entering my mouth and slipping down my gullet. Happy, happy cows.


Perfect All-American Chocolate Butter Cake
(Also known as Victory Cake because it is the cake I made to take to an election party the night Obama was elected)

1/2 c plus 3 T lightly spooned into to measuring cup Dutch-processed unsweetened cocoa
1 c boiling water
3 large eggs
2 1/4 tsp vanilla
2 1/4 c sifted cake flour
1 1/2 c sugar
1 T baking powder
3/4 tsp salt
1 c unsalted butter, softened

1. Preheat oven to 350 degrees F. Grease and flour 2 standard 12-cup cupcake tins.
2. Whisk together the cocoa and boiling water until smooth. Cool to room temperature.
3. In another bowl, lightly combine the eggs, 1/4 of the cocoa mixture, and vanilla.
4. In the bowl of an electric mixer, combine the remaining dry ingredients and mix on low speed for 30 seconds to blend. Add the butter and remaining cocoa mixture. Mix on low speed until the dry ingredients are moistened. Increase to medium speed and beat for 1 1/2 minutes to aerate and develop the cake's structure. Scrape down the sides. Gradually add the egg mixture in 3 batches, beating for 20 seconds after each addition to incorporate the ingredients. Scrape down sides.
5. Scrape the batter into the prepared cupcake pans and smooth the surface with a spatula. The pans will be about 1/2 full. Bake 25-35 minutes or until a tester inserted near the center of one of the cakes comes out clean and the cake springs back when pressed lightly in the center. Let cakes cool on racks for 10 minutes. Loosen the sides with a small metal spatula and turn out onto racks. Let cool completely before frosting.

*You can also make this cake in two 9-inch by 1 1/2 inch greased cake pans or 1 9x13 inch greased pan.

Fluffy Vanilla Buttercream Frosting


1 1/2 c (3 sticks) unsalted butter, room temperature
1 lb (4 cups) confectioners' sugar, sifted
1/2 tsp pure vanilla extract

1. Using an electric mixer, beat butter on medium-high speed until pale and creamy, about 2 minutes.
2. Reduce speed to medium. Add the sugar, 1/2 c at a time, beating well after each addition and scraping down the sides. After every two additions, increase speed to high and beat for 10 seconds to aerate frosting, then return to medium.
3. Add vanilla and beat until smooth.

*Frosting can be kept for 10 days in the refrigerator in an airtight container. Before using, bring to room temperature and beat at low speed until smooth, about 5 minutes.

Sunday, November 22, 2009

Cream Puffs Rising


When I was in college and home for the holidays, I once attempted to make gougeres, which are savory cream puffs typically eaten, at least in the U.S., as an hors d' oeuvre. I failed miserably. For some reason, a reason I never did put my finger on, the puffs never rose. Needless to say, they were not exactly appealing to eat, even though my family graciously popped a few in their mouths and told me they tasted "fine." "Fine," when used in this rather unfavorable way, is not exactly the description a baker hopes to hear. Sadly, I have never attempted any type of cream puff recipe since, though I have often looked longingly at recipes and photographs of the little delights, dreaming of one day giving them a go once again.

A few weeks ago, I was given the nudge I needed. I typically make cakes to celebrate people's birthdays, and it rarely occurs to me to ask people what kind of dessert they want.
When my dad's girlfriend, Reka, hesitated in responding to my question of what kind of cake she wanted to celebrate her big day, however, it occurred to me that I might branch out a bit. Afterall, it was her birthday, and what could be better than celebrating your birthday with a dessert of your choice?

Cream Puffs were her response. The answer gave me pause. Did she mean the little puffs of dough which looked so heavenly but whose puffy goodness seemed to me a mystery to achieve? In the same moment that I was intimidated by the prospect of making them, however, I was excited to finally have another opportunity to attempt this classic and elegant dessert. When I made them and brought them to my dad's for the birthday dinner one Sunday night a few weeks ago, I would have described them using the same word my family used years ago but with the word's traditional meaning of elegant and perfect rather than the more bastardized meaning it has come to mean, as in "okay," or "not fabulous." These cream puffs were fine indeed.


CREAM PUFFS
Simply put, well-made cream puffs are enchanting. You can pop one whole in your mouth and the taste and feel seems so luxurious. A proud little cream puff with a single candle stuck in it can also make a rather charming little birthday "cake." The best part, however, is watching the little puffs rise in the oven, a mysteriously bewitching process. The dough mounds, which start off as rather limp little plops of batter on a baking sheet, rise like magic to golden puffs while they bake. The amazing part is that the dough contains no baking powder or baking soda but rises from the moisture and the eggs. For me, that is really all the entertainment I need.

These cream puffs scared me a little bit before I made them, but they were actually pretty easy to make, although they took some time and patience. The one tricky part was determining how much egg and water to add to the dough--the instructions say the dough should form a "string," and I had to add quite a bit of egg and water for the dough to achieve this while I kept asking myself, about a zillion times, "Is this a string yet?" However, when the dough finally does form a string, you will know it.

If you have never made cream puffs, or if you have tried and failed, I urge you to make these puffs. You should either rush out and make them tonight before Thanksgiving demands pies of your time, or you should wait until the real holiday season and serve these for dessert. They are fit for a fancy holiday occasion and are sure to delight your guests.

HOW TO MAKE CREAM PUFFS
When making cream puffs, you start with a dough called a Pate a Choux, or a butter and flour dough mixed in a saucepan and beaten in a mixer while adding egg and water. The dough is then piped onto cookie sheets, baked, and filled with pastry cream that has had whipped cream folded into it. While you could dust the finished puffs with powdered sugar, I like them a bit fancier. To literally top off these cream puffs, I served them with a chocolate sauce made of bittersweet chocolate, butter, and heavy cream.

Cream Puffs
Recipe for dough and assembly courtesy of Martha Stewart's Cooking School

1 recipe pate a choux (recipe below)
1 large egg for finishing
1 T water for finishing
1 recipe whipped pastry cream (recipe below)
1 recipe chocolate sauce (recipe below)


1. Prepare Your Oven and Cookie Sheets: Heat oven to 400 degrees F and place one rack in the center of the oven. Line two baking sheets with parchment paper or nonstick baking mats (this is a must). Use a 1 1/2 inch round cookie cutter (or other round object) dipped in flour to make circles on pan where you will pipe the dough.

2. Make Cream and Dough: Make the pastry cream and refrigerate it. Make the pate a choux.

3. Pipe the Dough: Fill a pastry bag fitted with a plain round 3/4 inch tip with some pate a choux, and, using the flour circles as your guide, pipe 1 1/2 inch rounds (3/4 inches high) onto baking sheets. Beat together the egg and water, and use your finger to rub egg wash over the entire surface of each dough mound and flatten tips left from piping. Be careful not to let the wash drip on the sheet, because it will inhibit rising.

4. Bake the Dough: Bake the puffs 1 cookie sheet at a time for 15 minutes at 400 degrees. Reduce the temperature to 350 degrees and bake about 20 minutes more, or until puffs are golden brown. Transfer to a wire rack to let cool completely. Return heat to 400 degrees and repeat process for remaining batch. (The baked and cooled puffs can be kept in a sealed container for about a day until ready to use or frozen for up to 2 weeks. Let thaw before filling.)

5. Fill and Finish: Right before you plan to eat or serve the cream puffs, spoon the whipped pastry cream into a clean pastry bag fitted with a plain round tip. Insert tip into the bottom of each puff and fill with the whipped pastry cream.

6. Make the Chocolate Sauce: Make the chocolate sauce and use immediately, while warm.

7. Serve: Mound the puffs on a plate and serve with a bowl of passed warm chocolate sauce (as I did) or place 2-3 puffs on each serving plate and spoon warm chocolate sauce over them. Alternatively, you could even mound the puffs on a serving plate, cover with chocolate sauce, and pass around the table. However, I prefer one of the former two serving methods.


The Recipes

Pate a Choux
1 c water, plus more as needed
1/2 c (1 stick) unsalted butter
1 tsp granulated sugar
1/2 tsp table salt
1 c all-purpose flour
4 to 5 large eggs (I used 5)

Combine the water, butter, sugar, and salt in a medium saucepan over medium-high heat. Bring to a boil, and immediately remove from heat. Using a wooden spoon, stir in the flour. When flour is combined, return to heat. Dry the mixture by stirring constantly over heat until it pulls away from the sides and a film forms on the bottom of the pan, about 4 minutes. Transfer mixture to the bowl of an electric mixer fitted with the paddle attachment, and mix on low speed, about 2 minutes, until slightly cooled. Add 4 eggs, one at a time, on medium speed, letting each one incorporate completely before adding the next. Test the batter by touching it with a flexible spatula or your finger, then lifting; it should form a string. If a string does not form, lightly beat the last egg and add it, a teaspoon at a time, until the batter is smooth and shiny. If you have added all the egg and the batter still doesn't form a string, add water, 1 teaspoon at a time, until it does.


Whipped Pastry Cream
(Makes about 1 3/4 c)
2 c whole milk
1/2 c sugar
1/2 vanilla bean, split lengthwise and seeds scraped (or 1 tsp vanilla extract, which is what I used)
3 large egg yolks
3 T plus 1 1/2 tsp cornstarch
2 T unsalted butter, cut into small pieces
1/3 c heavy whipping cream

Simmer milk, 1/4 c sugar, salt, and vanilla bean seeds if using in small saucepan over medium heat, whisking constantly. Whisk egg yolks and remaining 1/4 c sugar in a medium bowl. Whisk in cornstarch, 1 T at a time. Ladle 1/2 c hot-milk mixture into yolk mixture, whisking. Add remaining milk mixture, 1/2 cup at a time. Pour mixture into pan, and heat over medium-high, whisking constantly, until mixture comes to a full boil and is thick enough to hold its shape when lifted with a spoon, about 2 minutes. Stir in butter and vanilla. Remove from heat and pour mixture into a bowl; place plastic wrap directly on surface to prevent a skin from forming. Refrigerate until cold, at least 2 hours (or up to 2 days). When ready to assemble the puffs, whip the heavy cream until medium peaks form. Stir pastry cream to soften. Add whipped cream to pastry cream in two batches, folding to combine after each.


Chocolate Sauce
6 oz bittersweet chocolate, chopped (I used Ghirardelli chips, which need no chopping)
3/4 c heavy cream
1 T butter

Place all the ingredients in the top of a double boiler (or in a metal bowl set over a pan of simmering water--water should come up the sides of the pan about 1 inch and should not touch the bowl) and mix together as the chocolate and butter melt. As soon as the chocolate and butter are mostly melted, remove from stove and stir together to form a smooth, shiny sauce. Use immediately, or refrigerate and reheat in the microwave (be careful not to burn it!) or over the top of a double boiler again.


Baked Puffs

HOW-TO IN PICTURES
1. Baking sheets are prepared with cutters dipped in flour to make circles.

2. Pate a Choux is mixed in a pan.

3. After being mixed in an electric mixer, pate a choux batter is piped onto baking sheets.

4. Pate a choux is baked.

5. Whipped cream is folded into the yolky pastry cream.

6. Whipped pastry cream is piped into the bottom of each cream puff.
7. Filled cream puffs are served with chocolate sauce.

Saturday, November 14, 2009

It's Coming Up Apples, the Juicy Kind


A Zombie in Apple Season
I've missed apple season. It's sad, because I love autumn's flavors and possibilities, bits of sunny warmth studded through cold days the way fresh apple bits might stud a quick loaf with little bursts of sweetness on the tongue.

In a typical year, I would celebrate apple season, making the trek to an orchard or two to pick up apples and then cooking apple dishes for an entire weekend. This is what I like to call AppleFest. But AppleFest didn't happen this year.

Instead, I was busy running red lights (something I don't recall ever doing in my life) as I made my sleepy trip to school in the early morning darkness, arriving to an unlit hallway where my heels echoed across the old-school black and white tiles. Lights. I kept thinking. Lights would be nice. But the special key to turn on the lights doesn't arrive until around 7 am, and so I walk blindly through the dark hallway until I reach my office.

There is undoubtedly something wrong about waking at 4 am and coming home at almost 8 and working some more until you fall asleep, five days per week, then working two full days on Saturday and Sunday. When the 12 or 14 hour work days are not just a phenomenon of the beginning of another school year but the norm for a 12-month year, it can seem crazy. Yet it's a hard problem to see in the darkness of early morning when you've got copies to make, think-alouds to go over in your mind, rooms to set up, students waiting, when the line at the copier at 6:15 includes not just you but five others.

One morning, waking at 3:30 in the now chilly darkness of September and driving in a zombie-esque trance to school, I realized something was not okay. It's hard to see the problem when there are others involved, when normal is 12 hour work days that extend even longer into your bedtime once you get home, when you do it under the noble name of teaching. But that morning, arriving at 5:00 am to a parking lot not empty, I began to wonder what was wrong with all of us. All I could think about were the sweet apples ripening on trees somewhere, apples that might have ripened for me but that I will never taste.

Symbolic Apples and Other Teaching Matters
Apples are supposed to be the symbol of knowledge, of teaching. But, when the only apples I've seen this season are the ones in my mind or the bruised and mealy grocery store apples I throw in my lunch box to be eaten while I'm lesson planning, the ones that lack real juice, I can't help but wonder just what kind of knowledge we're passing on. When apples are a part of their own school lunch, students mostly throw them in the trash, complaining openly of their damaged and inauthentic skins, claiming they are not worthy of being eaten. I can't argue with them: my own lunch box apple looks the same, a product of my not having time, not making time, to pick one off a tree, and I don't particularly want to eat it either.

When our children (1 in 3 born after 2001, you know--thank you, Food, Inc.) grow up with diabetes, will it matter that they have the knowledge of calculus, that they can become lawyers, doctors, teachers themselves? When they can't breathe as they walk up the three flights of stairs to their offices and have to pause on each landing, when they die early leaving children who are themselves diabetic, how much will their Reading, Writing and Arithmetic education help them?

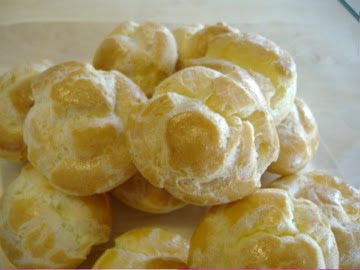
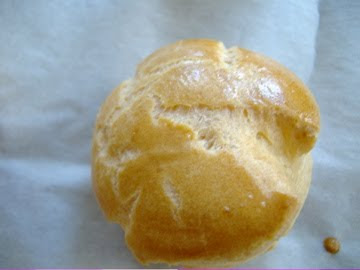
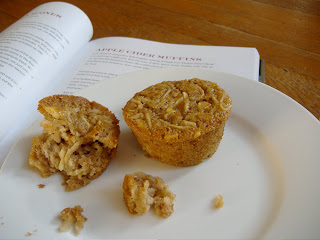
Don't get me wrong: education matters. It matters more than most things in this world, I think. But it doesn't matter more than food, which is the sweet truth of it all. Biting into my Tarte Tatin, my Caramelized Apple Skillet Cake, my Apple Cider Muffins and Apple Cider Loaf, (in a flurry of baking I do this weekend instead of working--an attempt to remind myself that I am a living being who needs real nourishment rather than factory-ripened "food," an attempt to make up for the much-missed apple season), I feel like Eve biting into the proverbial apple: there is a type of monumental sin involved. My lessons will suffer. My students will not "learn" as much this week. There will be several things on my "Priority To Do" list that will remain there, unaccomplished. But I know I must take these small steps toward a saner life, a saner world where students might get to eat real apples with juice inside. Where they might want to eat these apples, where the biting into of an apple will only feel like a sin (because of its damn good sweetness) but will in fact be a piece of a healthy and normal lifestyle. To me, this is what the world needs as much as the three Rs, and I just might be in the wrong movement.

Desire: Going to Work in the Garden of Superheroes
In his book, The Botany of Desire, Michael Pollan points out that the apple used to provide a sweetness hard to obtain elsewhere before cheap sugar became widely available. In this time before, the apple provided the fulfillment of a natural human survival mechanism: the desire for sweetness. And, this sweetness was nicely balanced with fiber and vitamins.


The author, Michael Pollan (my kind of superhero), and me at the Cornwall, CT farmer's market this past summer. ( I hope I can post his picture on the internet!)

Far from this desire and balance now, however, we turn away from this natural sweetness, denying ourselves the most basic of all human needs, nourishment, denying ourselves the opportunity to pick apples and make sweet apple cake under the name of work.

Teaching allows us to do this more than other professions with insane work hours because it is, without question, important for the world, for kids, and we work these hours under a noble name. It is one thing to question your excessive work hours when you are a lawyer helping rich people divide their assets in a divorce, when you are a stock broker making a pile of money for money's sake, or when you are managing a company with your sole vision being of the bottom line. But teaching, you say to yourself, that is important. How can I not work every waking moment for the benefit my students, who are behind (my ninth graders read, on average, at a fifth grade level; one reads at a second grade level, one at a third, and several at a fourth). It is undeniably important, acutely so, for them to be able to read. But at the heart of it all is this: their education and my life must be balanced, must mirror the sweet roundness of the apple, equal parts sugar and health. Biting into the apple must not only be okay but must be a way of life for all of us.

Although the apple is the symbol of the organization for which I work, Achievement First, the bold checkmark that slices through it is an illustration of what we are are so badly missing.
It is like the worm that taints a good apple, turning it from candy-like sweetness to rotten flesh, making it unhealthy, driving a hole through its core that will render it inedible. If what we are doing is putting a worm through all that knowledge rather than providing our students with a balanced, juicy bite of nourishment, then something is definitely wrong. If the apple is going to be our symbol then it's got to really be our symbol, and it's got to be real: seeds, juice, and all.

Don't get me wrong. AF, like similar high performing charters, (KIPP, to name one) does amazing things for children. Its problem is really not one that belongs to it as an organization, but to the teaching profession in general. AF and similar high-performing schools run on the sold souls of teachers who have given up their lives to spend nearly every waking moment working towards the success of their students. It asks teachers to be superheroes who sacrifice relationships, home-cooked meals, time with their children, and personal hobbies (think Spiderman giving up the beautiful and sweet Kirsten Dunst). AF's success, in other words, relies on the sick (I mean that in the true sense of the word) minds of individuals with a drive not just to help kids but to somehow prove themselves to the world.

These are people (and I'm not giving myself any kind of amnesty here, mind you) who need some serious therapy: a colleague with whom I've been emailing between the hours of 4 and 5 a.m. for the past week whose most recent email champions our obvious "type A" personalities and includes one of those smily-face symbols; another colleague who brags that she and her husband have begun working late into the night, side by side on the couch while their infant son sleeps, unaware of the life he will lead; a fellow teacher who is still living with his ex-girlfriend despite their recent breakup (his long work hours, such an obvious cause of their breakup, were never mentioned during the actual break-up conversation because they were, as he put it, so "implied" they didn't need to mention them); another colleague who proudly told me her mother had said she needed to "find another profession," as she hardly saw her infant son; and me, who can't help but to hypocritically write about all of this here while simultaneously engaging in the very things I criticize. If all of us were to start going to therapy, I believe our school would fall apart.

And, because the education world currently provides no balanced, happy apple-like medium for teachers and students, sometimes I just want to give up on all of it, pick apples and make Tarte Tatin, remind myself that I am human by nature and not superhuman. Sometimes, and not always while the apple chips are down, but more frequently while I'm riding high on my 4 am email wars or leveling books at 7 pm in quiet hallways, I just want to go and work in the garden, the real kind.


Juicy Apples: The Recipes

Tarte Tatin
from the Martha Stewart Baking Handbook

4 T unsalted butter, cut into small pieces, plus more for the pan
all-purpose flour, for dusting
1/2 recipe Pate Brisee (see recipe, below)
1 cup sugar
Dash of lemon juice
2 1/2 medium baking apples, such as Rome or Cortland (about 1 1/4 pounds), peeled, cored, and cut into quarters
Vanilla ice-cream, whipped cream, or creme fraiche for serving (optional)

Directions:
  1. Preheat oven to 425 degrees. Generously butter a 9-inch metal pie plate; set aside. Line a baking sheet with parchment paper, and set aside. On a lightly floured work surface, roll out the dough to a 9-inch round, about 1/4-inch thick. Place dough on the prepared baking sheet, and chill until firm, about 30 minutes.
  2. Meanwhile, in a small saucepan, mix together the sugar, 2 tablespoons cold water, and the lemon juice to form a thick syrup. Bring to a boil over high heat, swirling pan; cook until the mixture turns medium amber, about 3 minutes. Remove the pan from heat, and pour the mixture onto the bottom of the prepared pie plate. Immediately add the butter, distributing evenly.
  3. Arrange the apples, rounded sides down, around the bottom of the pan in a circular pattern, starting from the outside and working in, fitting them as close together as possible (the apples will be the top of the tart when served). Drape the chilled dough round over the apples to cover the mixture completely.
  4. Bake until golden, about 25 minutes. Meanwhile, line a rimmed baking sheet with a clean nonstick baking mat. Remove the tart from the oven, and immediately invert onto the mat, working quickly but carefully to avoid contact with the hot caramel. Using tongs, carefully lift the pie plate off of the tart. Transfer the sheet to a wire rack to cool. Serve warm with creme fraiche, if using.


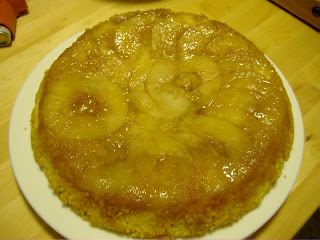
Caramelized-Apple Skillet Cake
by Karen DeMasco and
Mindy Fox


1 cup sugar
8 T (1 stick) unsalted butter, very soft
2 tart baking apples, such as Mutsu or Granny Smith
3/4 tsp. vanilla
2 large eggs, separated
3/4 c plus 3 T unbleached all-purpose flour
3 T coarse yellow cornmeal or fine polenta
1 1/2 tsp baking powder
1/4 tsp kosher salt
1/3 c whole milk

Directions:

1. Preheat oven to 350 degrees. In an 8-inch ovenproof skillet, preferably cast iron, combine 1/4 c of sugar with 2 t water, and stir. Cook over high heat, stirring occasionally, until the sugar turns a golden brown caramel, about 2 minutes. Remove pan from heat and whisk in 2 T butter.

2. Peel, core, and slice apples into 1/8-inch thick rings. Place the apples in an overlapping ring over the caramel, and work your way from the outside to the center of the pan.

3. In an electric mixer, combine the remaining 3/4 c sugar, remaining 6 T butter, and the vanilla. Beat on medium speed until light and fluffy, about 3 minutes. Mix in egg yolks, one at a time.

4. In another bowl, whisk together the flour, cornmeal, baking powder, and salt. In three additions, add the flour mixture, alternating with the milk, to the butter mixture. Using a rubber spatula, scrape the batter into a large bowl.

5. Clean and dry the mixer bowl (fat residue will keep the whites from becoming fluffy). Add the whites and, using the whisk attachment, beat to soft peaks. Fold whites into batter in 3 additions.

6. Spread batter evenly over the apples in the skillet. Bake, rotating the skillet halfway through, until the cake is golden brown and firm to the touch, 45 to 50 minutes. Place skillet on wire rack and cool just until arm, about 30 minutes. Run a knife around the edge of the pan and invert onto a plate.

*Cake is best eaten the day it is baked but can be kept at room temperature for up to 2 days.