
Who ya gonna call?
Me...if your child is having a back-to-the-80s Ghostbusters party.
Or if you are hosting a 2010 bridal shower and the bride's favorite color is "spring" green. As in, neon. Green. Trees and stuff, right?

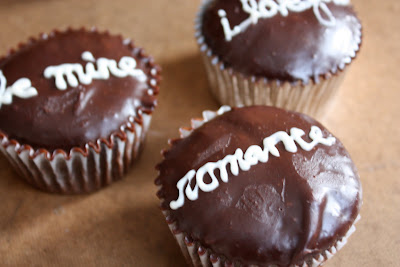
Well, let's just say it was rather dark at 5 am Sunday morning, and the lightbulbs in our kitchen are sort of burning out. And have I mentioned how lazy I can be sometimes? Seriously, though, in my defense, the cupcakes matched the plates and napkins perfectly. I'm not kidding. Check out the picture below.

At the last minute I decided (as I often mistakenly do) that 65 cupcakes weren't enough and I should make cookie favors too. I was inspired by
Bake at 350, who does beautiful cookie decorating work for all occasions, and who has detailed instructions on how to fill cookies
here. Thanks to her, I purchased a squeeze bottle and used it to fill in cookies with thinned royal icing after outlining them in regular royal icing with a #2 Wilton tip.

I used her recipe for
Vanilla-Almond Sugar Cookies
Vanilla-Almond Sugar Cookies
3 c unbleached, all-purpose flour
2 tsp baking powder
1 c sugar (I use sugar that I've stored vanilla beans in)
2 sticks butter
1 egg
1/2 tsp pure vanilla extract
1/2 tsp pure almond extract
Preheat oven to 350.Combine the flour and baking powder, set aside. Cream the sugar and butter. Add the egg and extracts and mix. Gradually add the flour mixture and beat just until combined, scraping down the bowl, especially the bottom.
Roll onto a floured surface and cut into shapes. Place on parchment lined baking sheets and bake for 10-12 minutes. Let sit a few minutes on the sheet, then transfer to a cooling rack.
Royal Icing
Keeps two weeks in an airtight container at room temperature.
3 larg egg whites *
4 c (sifted and lightly spooned into cup) powdered sugar
*The egg whites can be replaced with 3 T of meringue powder and 3 ounces (6 T) of warm water.
In a large mixing bowl, place the egg whites and powdered sugar and beat with whisk beater at low speed until sugar is moistened. Beat at high speed until glossy and stiff peaks form when the beater is lifted (5-7 min). The tips of the peaks should curve slightly. If necessary, more powdered sugar may be added.

With the cupcake carrying problem from my
Valentine Message Cupcakes solved with two new
Martha Stewart cupcake carriers, I had only a few issues left with which to contend. Unfortunately, my cookie icing refused to dry, and, once again, I had a plastic-sticking-to-sugar problem. So sad, I know. I only hope that no one actually tried to remove their cookie from the bag.
 A perfect pair. (I used the bride's and groom's first initials: "J" for "Jennifer" and "B" for Brian. It is not proper etiquette to use the bride's new name, if she so chooses to take it, before the actual ceremony has taken place. (So bride's new name at receptions are okay, but bridal showers are a definite faux pas!)

After a minor SNAFU (the cookies were too wide at the bottom to fit in the treat bags I had on hand), I was on my way to shower favor success with three straight rows of nicely bagged cookies. And no, the green icing did not look like green slime this time. It looked perfectly wedding-esque.

But anyways, back to the cupcakes. Here are the recipes.
Cupcakes
I love Rose's new book, Rose's Heavenly Cakes. After turning each page gluttonously in the bookstore and unsuccessfully trying to rationalize buying yet another baking book, this book arrived for me in the mail from none other than my mother. I've made the gingerbread cheesecake, banana cake with "Dreamy, Creamy White Chocolate Frosting" and now the cupcakes, all delicious and nearly flawless (except for the banana cake whose center, which never baked, I had to dig out--oops). I also carry this book around my apartment with me, constantly plotting my next bake. The Sticky Toffee Pudding has me mesmerized.
Batters
Chocolate Butter Cupcakes
These chocolate cupcakes are like brownies. They are more fudgelike than cakey, with a finer crumb and a dense interior. Personally, I prefer Rose's
Perfect All American Chocolate Butter Cake recipe, but it really depends on what you are looking for. These cupcakes actually grew on me after a while, and held up for several days (at room temp, already frosted).
1/2 c plus 1 T unsweetened and alkalized cocoa powder, sifted before measuring
1/2 c boiling water
2 large eggs
3 T water
1 1/2 tsp water
1 1/2 tsp vanilla
1 2/3 c cake flour
1 c superfine sugar (you can make this by food processing regular sugar)
2 tsp baking powder
1/8 tsp baking soda
1/2 tsp salt
12 T unsalted butter
Preheat oven to 350 degrees. Mix cocoa and water until smooth. Cover and let cool.
In a small bowl, whisk the eggs, 3 T water, and the vanilla together.
In a mixer, mix the flour, sugar, baking powder, baking soda, and salt for 30 seconds. Add butter and chocolate mixture until moistened. Raise speed to medium and beat for 1 1/2 minutes. Scrape sides of bowl.
Gradually add egg mixture in two parts, beating 30 seconds after each addition. Scoop a scant 1/4 c of batter into each of 16 muffin tins fitted with muffin liners.
Bake 20-25 minutes or until the cupcakes spring back when pressed lightly in the center and a wire cake tester comes out clean. Let cool in pan 10 minutes. Remove from pan and cool on rack.
Vanilla Butter Cupcakes
I've been looking for a vanilla cake recipe for a long time, and I think I've finally found it. There is something bland about the traditional yellow cake recipes out there, but this one has sour cream for a little tang, and a moist, sweet interior that is at once airy and yet laden with dense butter.
2 large eggs
2/3 cup sour cream
1 1/2 tsp vanilla
2 c cake flour (sifted into the cup and leveled off)
1 c superfine sugar
1/2 tsp baking powder
1/2 tsp baking soda
1/2 tsp salt
12 tbsp unsalted butter
In a small bowl, whisk eggs, 3 T sour cream, and vanilla just to combine.
In a mixer, mix flour, sugar, baking powder, baking soda, and salt on low speed for 30 seconds. Add butter and remaining sour cream and mix on low speed until the dry ingredients are moistened. Raise speed to medium and beat for 1 1/2 minutes. Scrape down sides of bowl.
Gradually add egg mixture in two parts, beating on medium for about 30 seconds after each addition. Scrape down sides. Fill 16 lined standard cupcake tins with about 1/4 cup batter each and bake 20-25 minutes or until cake springs back when lightly pressed. Cool on wire rack in pans for 10 minutes, then remove from pans and continue to cool on rack until completely cooled.
Buttercreams
I liked making these two buttercreams together because one called for whites and the other yolks.
Chocolate Neoclassic Eggwhite Buttercream
This buttercream is light, airy, and when just whipped produces a beautiful, pale brown.
5 ounces dark chocolate (60% to 70% cocoa)
2 sticks unsalted butter
2 large egg whites (1/4 cup or 2 ounces)
1/4 tsp cream of tartar
1/2 cup superfine sugar
Heat chocolate until almost completely melted. Stir until melted.
In the bowl of a stand mixer fitted with the whisk beater, beat butter until smooth and creamy. In a separate bowl, beat the egg whites (use a clean beater) until frothy. Add cream of tartar. Beat until soft peaks form. Gradually beat in sugar until stiff peaks form.
Beat the butter into the egg whites 1 T at a time on medium speed. Use at once or set aside for up to 4 hours. If keeping longer than 4 hours, refrigerate (I refrigerated some of the leftover for 6 days and it still tasted as good as the first day!), then bring to room temp before beating again. If it curdles, continue to beat until no longer curdled.
Golden Neoclassic Buttercream
This buttercream comes out a pale yellow color, so beware! I used this one to make the green slime color, so the yellow didn't matter, although it was a shame to turn that beautiful yolky color into Who ya gonna call color.
3 large egg yolks (3 1/2 T or 1/7 ounces)
1/4 c plus 2 T superfine sugar
1/4 c corn syrup
1 tsp freshly squeezed lemon juice
16 T unsalted butter
1 tsp vanilla
Beat yolks on high speed until pale in color.
In a small saucepan, combine the sugar, corn syrup, and lemon juice. Stir with a silicone spatula until all the sugar is moistened. Heat over medium-high, stirring constantly, until the sugar dissolves and the syrup begins to bubble around the edges. Stop stirring completely and continue cooking for a few minutes until the syrup comes to a rolling boil. Immediately transfer to a glass measure to stop the cooking.
Add the syrup to the yolks. Begin by pouring in a small amount of syrup. Immediately beat on ihgh speed for 5 seconds. Add the remaining syrup the same way in three parts. For the last addition, use a silicone scraper to remove the syrup clinging to the glass measure and scrape it against the beater. If the syrup has hardened before most of it has been poured, soften it to pouring consistency for a few seconds in the microwave.
Allow to cool completely. To speed cooling, place the buttercream in an ice water bath or the refrigerator, stirring occasionally. When the outside of the bowl feels cool, beat the butter in by the tablespoon on medium-high speed. The buttercream will not thicken until almost all of the butter has been added. Add the vanilla and beat on low speed unti incorporated.


